Effortless No-Bake PB&J Quinoa Cups: Sweet Snacks Made Simple
Who says healthy can't be utterly delicious and incredibly easy? For too long, quinoa has been pigeonholed as a savory side dish, relegated to salads and grain bowls. But prepare to have your culinary world expanded, because we're here to shatter those preconceived notions with a game-changer: the humble yet magnificent
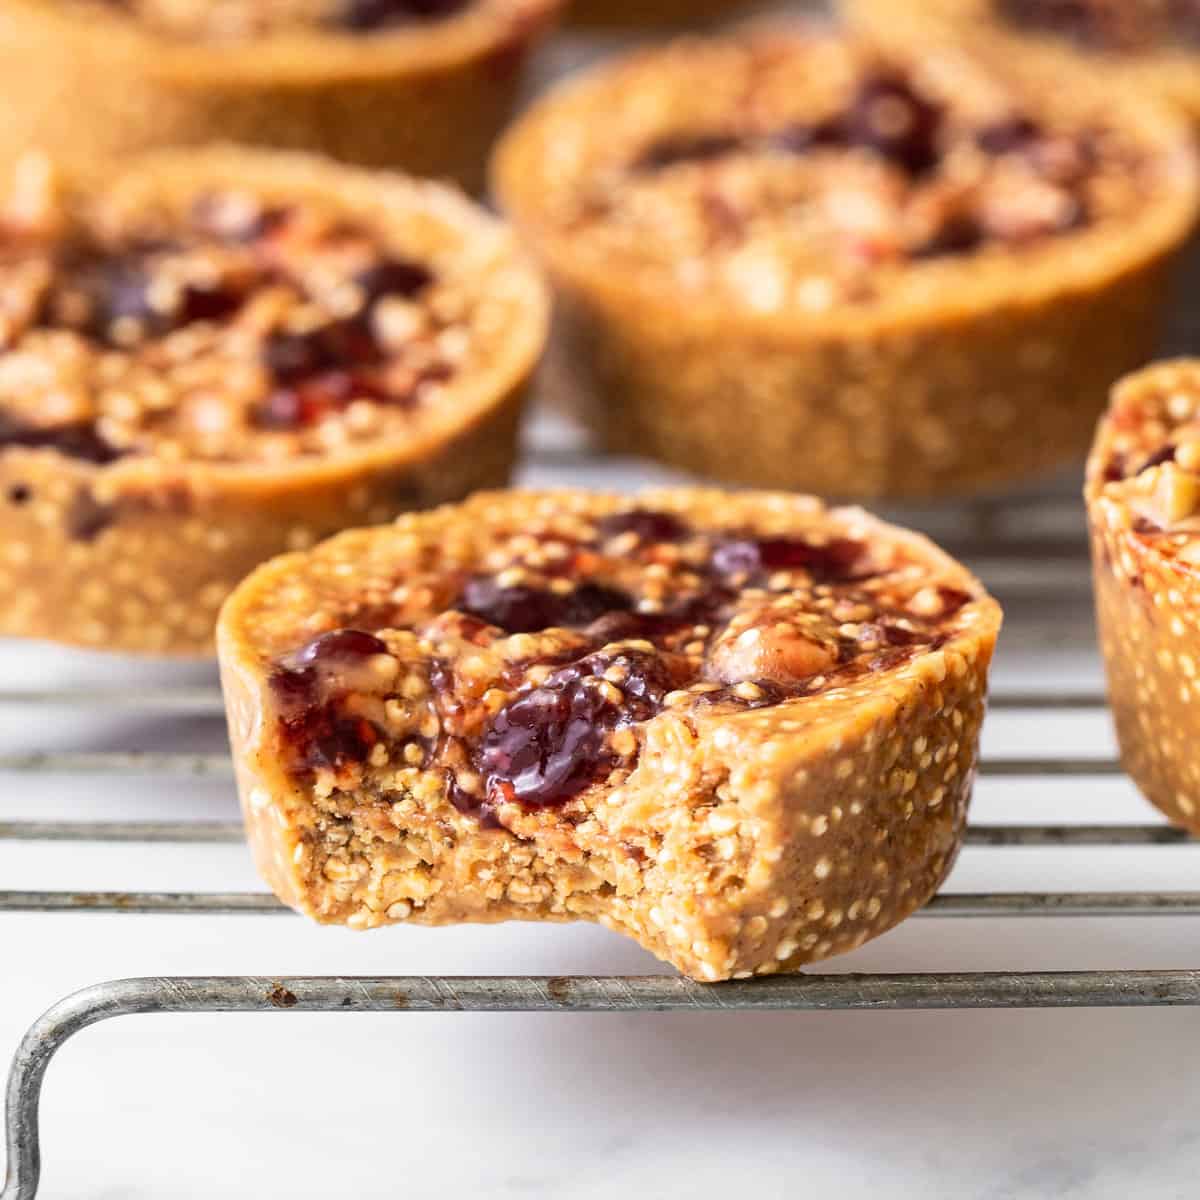
peanut butter and jelly quinoa cups. These aren't just any sweet snacks; they are an easy, no-bake revelation that marries the nostalgic comfort of PB&J with the unexpected crunch and nutritional boost of quinoa. Forget complicated desserts or endless baking; these delightful cups fit perfectly into a muffin tin, offering instant gratification or a convenient make-ahead treat.
Imagine sinking your teeth into a bite-sized treat that delivers a satisfying crunch, followed by the creamy, nutty richness of peanut butter, and a burst of sweet, fruity jelly. That's precisely what these no-bake wonders offer. They are designed for convenience, allowing you to enjoy them right away or store them for later, making them the ultimate easy snack for busy individuals and families alike.
The Magic Behind the Crunch: Toasted Quinoa Unveiled
The secret to the delightful texture of these peanut butter and jelly quinoa cups lies in the ingenious use of toasted quinoa. While you might picture "puffed" quinoa resembling a miniature, fluffy cloud, the reality for this recipe is a little different—and equally delicious. Instead of aiming for quinoa that doubles in size like popcorn, we're after a transformation that gives it a wonderfully crisp, nutty texture.
When you toast quinoa in a dry pan, it undergoes a subtle yet significant change. You'll hear a gentle popping sound, indicating that the grains are expanding slightly and becoming activated. Visually, they might not dramatically alter their appearance, but trust your senses: the aroma will become distinctly nutty, and most importantly, the texture will evolve. The goal is for the quinoa to become crunchy, similar to a small, toasted nut. This process not only imparts an incredible textural element but also enhances the quinoa's inherent nutty flavor, making it a perfect foundation for the classic peanut butter and jelly pairing. This "activated" quinoa offers a unique bite that elevates these cups far beyond a simple mixture of nut butter and jam.
The beauty of incorporating quinoa isn't just about texture; it also silently infuses these sweet snacks with a powerhouse of nutrition. Quinoa is a complete protein, meaning it contains all nine essential amino acids, and it's rich in fiber, vitamins, and minerals. So, while you're enjoying a truly indulgent-tasting treat, you're also fueling your body with wholesome goodness. It’s a win-win for your taste buds and your well-being.
Crafting Your Own Peanut Butter and Jelly Quinoa Cups: Ingredients & Process Insights
Creating these irresistible
peanut butter and jelly quinoa cups is surprisingly straightforward, requiring minimal effort for maximum reward. The beauty lies in the simplicity of the ingredients and the no-bake method. Here's a deeper dive into what you'll need and how to bring it all together, ensuring perfect results every time.
Essential Ingredients:
*
1 cup uncooked white quinoa: The star of our crunch. White quinoa tends to have a milder flavor, allowing the PB&J to shine.
*
1 cup all-natural peanut butter (drippy): The "drippy" consistency is crucial here. Natural peanut butter, often separated with oil on top, blends much more easily and helps bind the cups without being overly stiff. Avoid overly processed, sugary brands if you're aiming for a healthier profile. If your peanut butter is too thick, gently warm it to achieve a more fluid consistency.
*
¼ cup melted coconut oil, separated: Coconut oil plays a dual role: it helps bind the mixture and, once chilled, provides structure to the cups, allowing them to hold their shape. Separating it means you might use a tiny bit more for greasing if not using liners.
*
¼ cup honey: Our natural sweetener. Honey complements peanut butter beautifully and adds a subtle floral note. Maple syrup can be a great vegan alternative.
*
½ cup chopped peanuts: For an extra layer of crunch and intensified peanut flavor. These are optional but highly recommended.
*
12 teaspoons raspberry or grape jam (or your favorite): The classic jelly component. Raspberry offers a tart contrast, while grape brings pure nostalgia. Choose a high-quality jam with good fruit content for the best flavor.
*
1.5 teaspoons coarse salt: A pinch of salt is essential to balance the sweetness and enhance the flavors of both the peanut butter and the quinoa. Don't skip it!
Step-by-Step Excellence:
1.
Toast the Quinoa: Start by rinsing your quinoa thoroughly. Then, in a dry skillet over medium heat, toast the quinoa, stirring frequently. You'll begin to hear faint popping sounds and notice a nutty aroma. This usually takes 5-7 minutes. Once toasted and crunchy, remove from heat and let cool. This step is vital for the desired texture, so don't rush it!
2.
Combine Wet Ingredients: In a large bowl, whisk together the drippy peanut butter, melted coconut oil, honey, and coarse salt until thoroughly combined and smooth. The mixture should be well-emulsified.
3.
Fold in the Crunch: Add the cooled toasted quinoa and chopped peanuts to the wet mixture. Stir well with a spatula until every grain of quinoa and every peanut piece is evenly coated. This ensures a consistent texture and flavor in every bite.
4.
Form the Cups: Line a 12-cup muffin tin with paper liners, or lightly grease each cup with a tiny bit of the melted coconut oil. Divide the quinoa mixture evenly among the 12 cups, pressing down firmly with the back of a spoon or your fingers to create a compact base. The firmness here is key to preventing crumbling later.
5.
Add the Jelly: Top each cup with a teaspoon of your chosen jam. You can leave it as a dollop or gently swirl it into the top layer of the quinoa mixture for a marbled effect.
6.
Chill to Perfection: Transfer the muffin tin to the refrigerator for at least 1-2 hours, or until the cups are completely set. The coconut oil will solidify, binding everything together. Once firm, carefully remove them from the muffin tin.
For an even easier grab-and-go option, you can learn more about perfecting the make-ahead aspect by visiting
Unlock Sweet Quinoa: Crunchy PB&J No-Bake Cups Recipe Guide.
Beyond the Basics: Customization and Storage Tips
While the classic PB&J combination is undeniably delicious, these
peanut butter and jelly quinoa cups are incredibly versatile, offering a canvas for your creativity. Don't be afraid to experiment with different ingredients to suit your taste preferences or dietary needs.
Creative Customizations:
*
Nut Butter Alternatives: Swap out peanut butter for almond butter, cashew butter, or even sunflower seed butter (for nut-free options). Ensure they are natural and drippy for best results.
*
Jam & Jelly Variations: Explore beyond raspberry and grape! Strawberry, apricot, cherry, or even a spicy pepper jelly for a gourmet twist can be fantastic. You can also opt for sugar-free jams to reduce the overall sugar content.
*
Sweetener Swaps: While honey offers a unique flavor, maple syrup or agave nectar can be used as vegan alternatives, or a sugar-free syrup for a lower-carb version. Adjust to your desired sweetness.
*
Mix-Ins & Toppings:
*
Chocolate Chips: A sprinkle of mini chocolate chips (dark, milk, or white) can elevate these to a dessert-level treat.
*
Shredded Coconut: Toasted coconut flakes add another layer of flavor and texture.
*
Seeds: Chia seeds, flax seeds, or hemp seeds can boost the nutritional profile without altering the taste significantly.
*
Spices: A pinch of cinnamon or a dash of vanilla extract can enhance the overall flavor profile.
*
Different Nuts: Instead of peanuts, try chopped walnuts, pecans, or almonds for a different nutty dimension.
Storage for Long-Lasting Enjoyment:
One of the most appealing aspects of these no-bake treats is their incredible make-ahead potential and freezer-friendliness.
Once your
peanut butter and jelly quinoa cups have fully set in the refrigerator, carefully remove them from the muffin tin. Transfer them to an airtight, freezer-safe container. You can store them in the freezer for up to 3 months, ensuring you always have a wholesome and delicious snack on hand. For best results and to prevent sticking, you might want to place a piece of parchment paper between layers if stacking them.
When you're ready to enjoy, simply pull one out of the freezer. They thaw relatively quickly at room temperature, or you can enjoy them straight from the freezer for a firmer, almost ice cream-like texture – a perfect cool treat on a hot day! This superb make-ahead capability makes them ideal for meal prepping, packing in lunchboxes, or having a quick, healthy snack readily available. To delve deeper into optimizing their storage and maximizing convenience, check out
Make Ahead PB&J Quinoa Cups: Freeze for Months of Easy Snacking.
Why These Quinoa Cups Are Your Next Go-To Snack
In a world full of highly processed, sugar-laden snacks, finding options that are both genuinely tasty and nutritionally sound can feel like a quest. These
peanut butter and jelly quinoa cups are the answer you’ve been searching for. They offer a delightful blend of protein, fiber, and healthy fats, providing sustained energy without the sugar crash.
Their no-bake nature means less time in the kitchen and more time enjoying life. They are perfect for kids' lunchboxes, post-workout fuel, an afternoon pick-me-up, or even a guilt-free dessert. The unique crunch from the toasted quinoa sets them apart, offering a textural experience that satisfies.
In conclusion, these effortless no-bake peanut butter and jelly quinoa cups are more than just a recipe; they're an invitation to rethink your sweet snack game. They prove that healthy eating doesn't have to be bland or complicated, marrying nostalgic flavors with modern, nutrient-dense ingredients. With their ease of preparation, versatility, and fantastic make-ahead potential, these crunchy, sweet bites are poised to become a staple in your kitchen. So, gather your ingredients, toast that quinoa, and prepare to fall in love with your new favorite sweet treat!